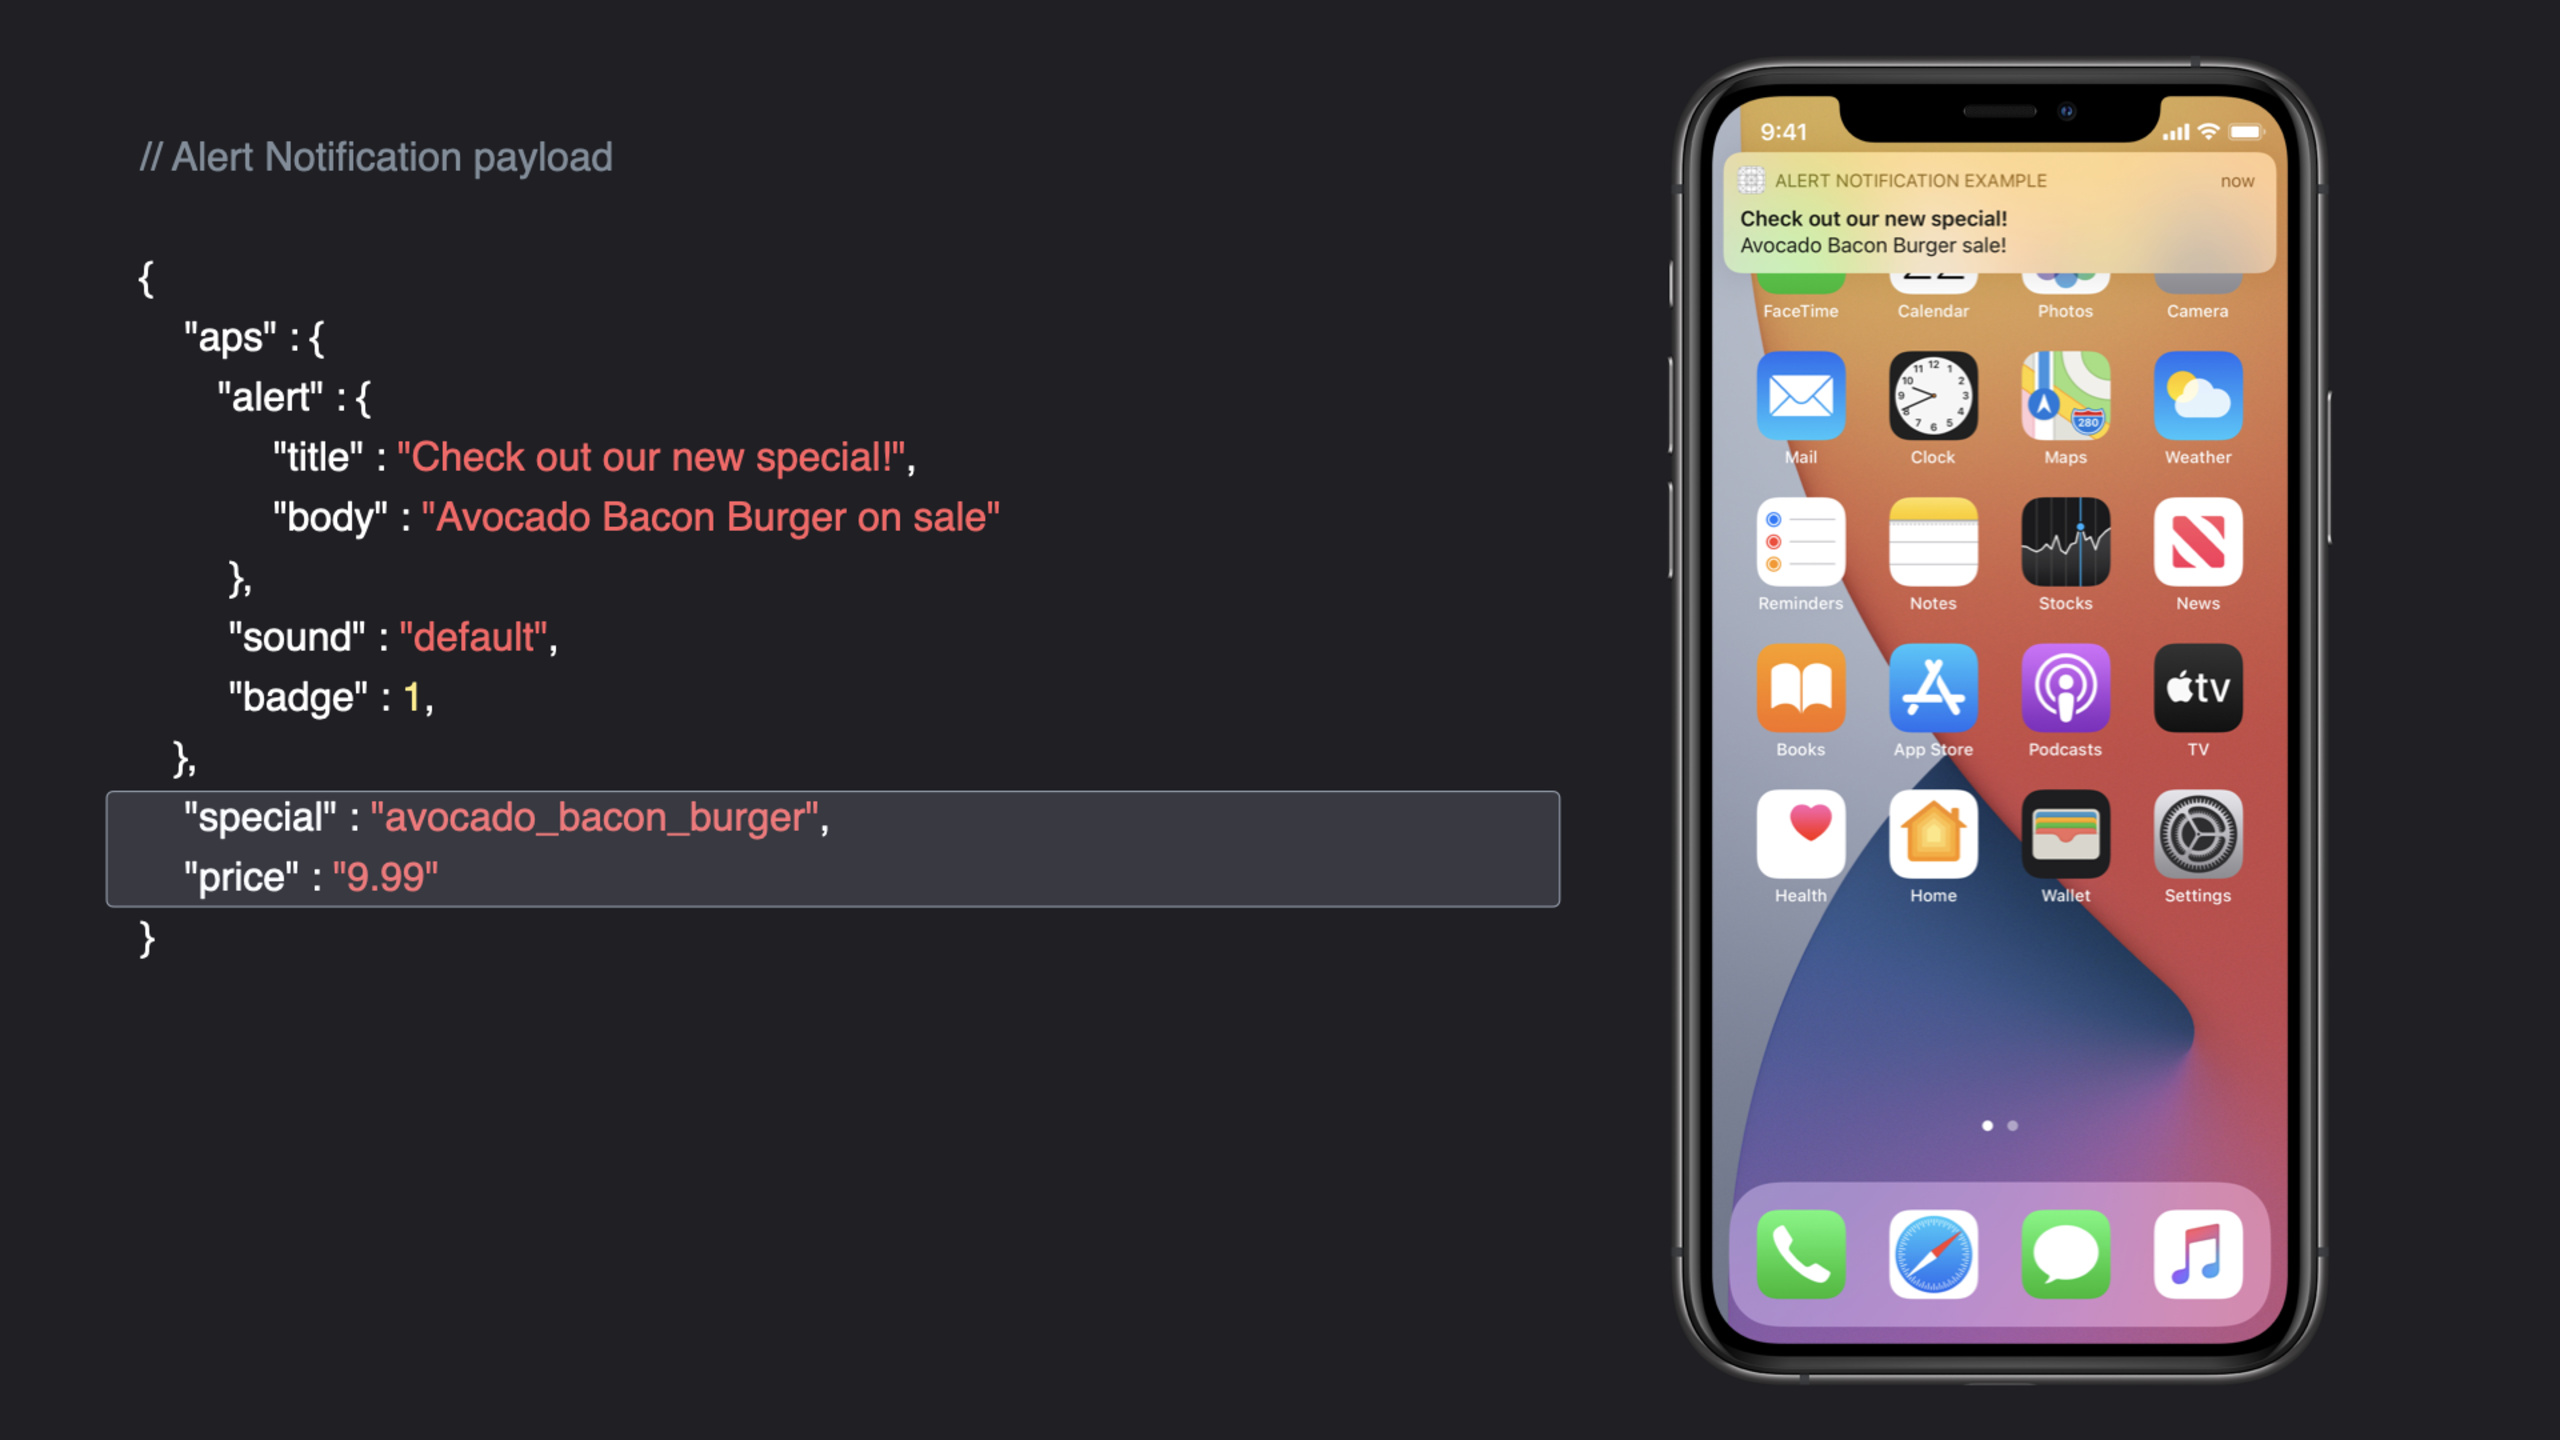
推送通知入门指南
The Push Notifications primer
2020年6月25日
一句话判断
如果你对 APNs 的完整链路(Device Token -> Provider Server -> APNs -> Device)还似懂非懂,这个 Session 用一个多小时的完整讲解帮你从头梳理清楚推送通知的每个环节。
这场 Session 讲了什么
这是一个面向推送通知初学者的完整教程。Session 从最基础的概念开始讲解:什么是远程推送、为什么需要 Device Token、APNs 的工作原理、以及如何在客户端和服务端分别实现推送功能。
Session 把推送链路拆解为四个步骤。第一步:设备向 APNs 注册,获取 Device Token。第二步:将 Device Token 发送到你自己的 Provider Server。第三步:Provider Server 用 Token 向 APNs 发送推送请求。第四步:APNs 将推送投递到用户设备。每一步都配有详细的代码示例和常见错误说明。Session 还介绍了 iOS 14 中推送通知的新变化,包括改进的后台推送处理和更丰富的通知内容扩展。
值得深挖的点
Device Token 的生命周期管理
Device Token 不是一成不变的。系统会在某些情况下更新 Token(比如系统升级、备份恢复、用户在多设备间切换)。你的 App 必须在每次启动时都调用注册接口,并在 Token 变化时将新 Token 上报给服务器。Apple 还特别强调:不要缓存 Token 然后跳过注册,也不要尝试在不同设备间共享 Token。Token 是和特定设备绑定的。
后台推送 vs 可见推送
推送分为两种类型:静默推送(content-available: 1)和可见推送(带 alert/body)。静默推送不会显示任何 UI,只是唤醒 App 让它在后台处理数据。可见推送会显示系统通知。关键区别在于:静默推送受系统节流(throttling)限制,如果用户很少打开你的 App,系统会降低静默推送的投递频率。可见推送则不受这个限制。
代码片段
注册远程推送并处理 Device Token
场景:在 App 启动时注册推送并获取 Device Token。
import UIKit
import UserNotifications

class AppDelegate: UIResponder, UIApplicationDelegate {

    func application(_ application: UIApplication,
                     didFinishLaunchingWithOptions launchOptions: [UIApplication.LaunchOptionsKey: Any]?) -> Bool {

        // 第一步:请求用户授权
        UNUserNotificationCenter.current().requestAuthorization(options: [
            .alert, .badge, .sound
        ]) { granted, error in
            if granted {
                print("用户授权了通知权限")
                // 第二步:注册远程推送
                DispatchQueue.main.async {
                    application.registerForRemoteNotifications()
                }
            } else {
                print("用户拒绝了通知权限")
            }
        }

        return true
    }

    // 第三步:处理注册成功,获取 Device Token
    func application(_ application: UIApplication,
                     didRegisterForRemoteNotificationsWithDeviceToken deviceToken: Data) {
        // 将 Data 转换为十六进制字符串
        let tokenString = deviceToken.map { String(format: "%02x", $0) }.joined()
        print("Device Token: \(tokenString)")

        // 发送到你的 Provider Server
        sendTokenToServer(tokenString)
    }

    // 处理注册失败
    func application(_ application: UIApplication,
                     didFailToRegisterForRemoteNotificationsWithError error: Error) {
        print("注册推送失败: \(error)")
        // 可能是模拟器、无网络、或 APNs 不可用
    }

    private func sendTokenToServer(_ token: String) {
        // 将 Token 发送到你的后端服务器
        // 使用 HTTPS 请求,不要在 URL 中传递 Token
        guard let url = URL(string: "https://api.yourapp.com/register-token") else { return }

        var request = URLRequest(url: url)
        request.httpMethod = "POST"
        request.setValue("application/json", forHTTPHeaderField: "Content-Type")

        let body = ["device_token": token, "platform": "ios"]
        request.httpBody = try? JSONSerialization.data(withJSONObject: body)

        URLSession.shared.dataTask(with: request).resume()
    }
}
处理收到的推送通知
场景:处理前台和后台的推送消息。
// 设置通知代理
class AppDelegate: NSObject, UNUserNotificationCenterDelegate {

    func setupNotificationCenter() {
        UNUserNotificationCenter.current().delegate = self
    }

    // 前台收到推送时的处理
    func userNotificationCenter(_ center: UNUserNotificationCenter,
                                willPresent notification: UNNotification,
                                withCompletionHandler completionHandler: @escaping (UNNotificationPresentationOptions) -> Void) {

        let userInfo = notification.request.content.userInfo

        // 检查是否是静默推送
        if let aps = userInfo["aps"] as? [String: Any],
           aps["content-available"] as? Int == 1 {
            // 静默推送:在后台处理数据
            handleBackgroundUpdate(userInfo)
            completionHandler([])  // 不显示通知 UI
        } else {
            // 可见推送:显示通知横幅
            completionHandler([.banner, .sound, .badge])
        }
    }

    // 用户点击通知后的处理
    func userNotificationCenter(_ center: UNUserNotificationCenter,
                                didReceive response: UNNotificationResponse,
                                withCompletionHandler completionHandler: @escaping () -> Void) {

        let userInfo = response.notification.request.content.userInfo

        // 根据通知内容导航到对应页面
        if let articleId = userInfo["article_id"] as? String {
            navigateToArticle(id: articleId)
        }

        completionHandler()
    }

    private func handleBackgroundUpdate(_ userInfo: [AnyHashable: Any]) {
        // 下载新内容、更新数据库等
        print("处理后台更新: \(userInfo)")
    }
}
Provider Server 端发送推送(伪代码参考)
场景:你的后端服务器如何向 APNs 发送推送请求。
// 这段代码展示了 Provider Server 端的逻辑
// 实际使用时通常用 Node.js/Python/Go 等后端语言

// APNs 请求的 HTTP/2 格式
// POST https://api.push.apple.com/3/device/{device_token}
// Headers:
//   authorization: bearer {jwt_token}
//   apns-topic: com.yourapp.bundleid
//   apns-push-type: alert  (或 background)
// Body:
// {
//   "aps": {
//     "alert": {
//       "title": "新消息",
//       "body": "你收到了一条新消息"
//     },
//     "badge": 1,
//     "sound": "default"
//   },
//   "article_id": "12345"  // 自定义数据
// }

// 静默推送格式
// {
//   "aps": {
//     "content-available": 1
//   },
//   "update-type": "new-content"
// }
最佳实践
已有项目:检查你的 Token 注册逻辑是否在每次 App 启动时都执行。如果只在首次安装时注册,你可能丢失了 Token 更新的情况。确保你的通知代理同时处理了前台和后台的场景。对于静默推送,不要在回调中做耗时过长的操作——系统给了你大约 30 秒的处理时间。
新项目:从第一天就集成推送通知,不要等到产品上线后再加。在开发阶段使用 APNs 的沙箱环境(sandbox.push.apple.com),发布时切换到生产环境。建议封装一个推送服务管理类,统一处理注册、Token 管理、消息接收等逻辑。
还有什么值得关注
- iOS 14 要求在推送请求的 Header 中包含
apns-push-type字段,否则推送可能被延迟。 - Token 的沙箱版本和生产版本是不同的,测试推送和生产推送要使用对应的 Token。
- 推送通知的速率限制(rate limiting):APNs 对单个设备的推送频率有隐式限制,避免短时间内发送大量推送。